Chili-Rubbed Venison and Home-Smoked Cheese Soiree
By Cecil Cherry
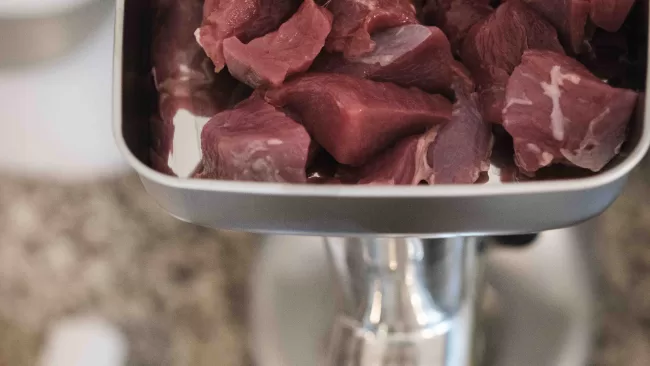
I was going through our freezer after hunting season and realized there were older vacuum-sealed bags of prime cuts of venison–roasts and backstrap–that were buried under newer additions to the freezer, escaping the dinner table. We needed to make room for other items, so we invited folks over for a wild game soiree.
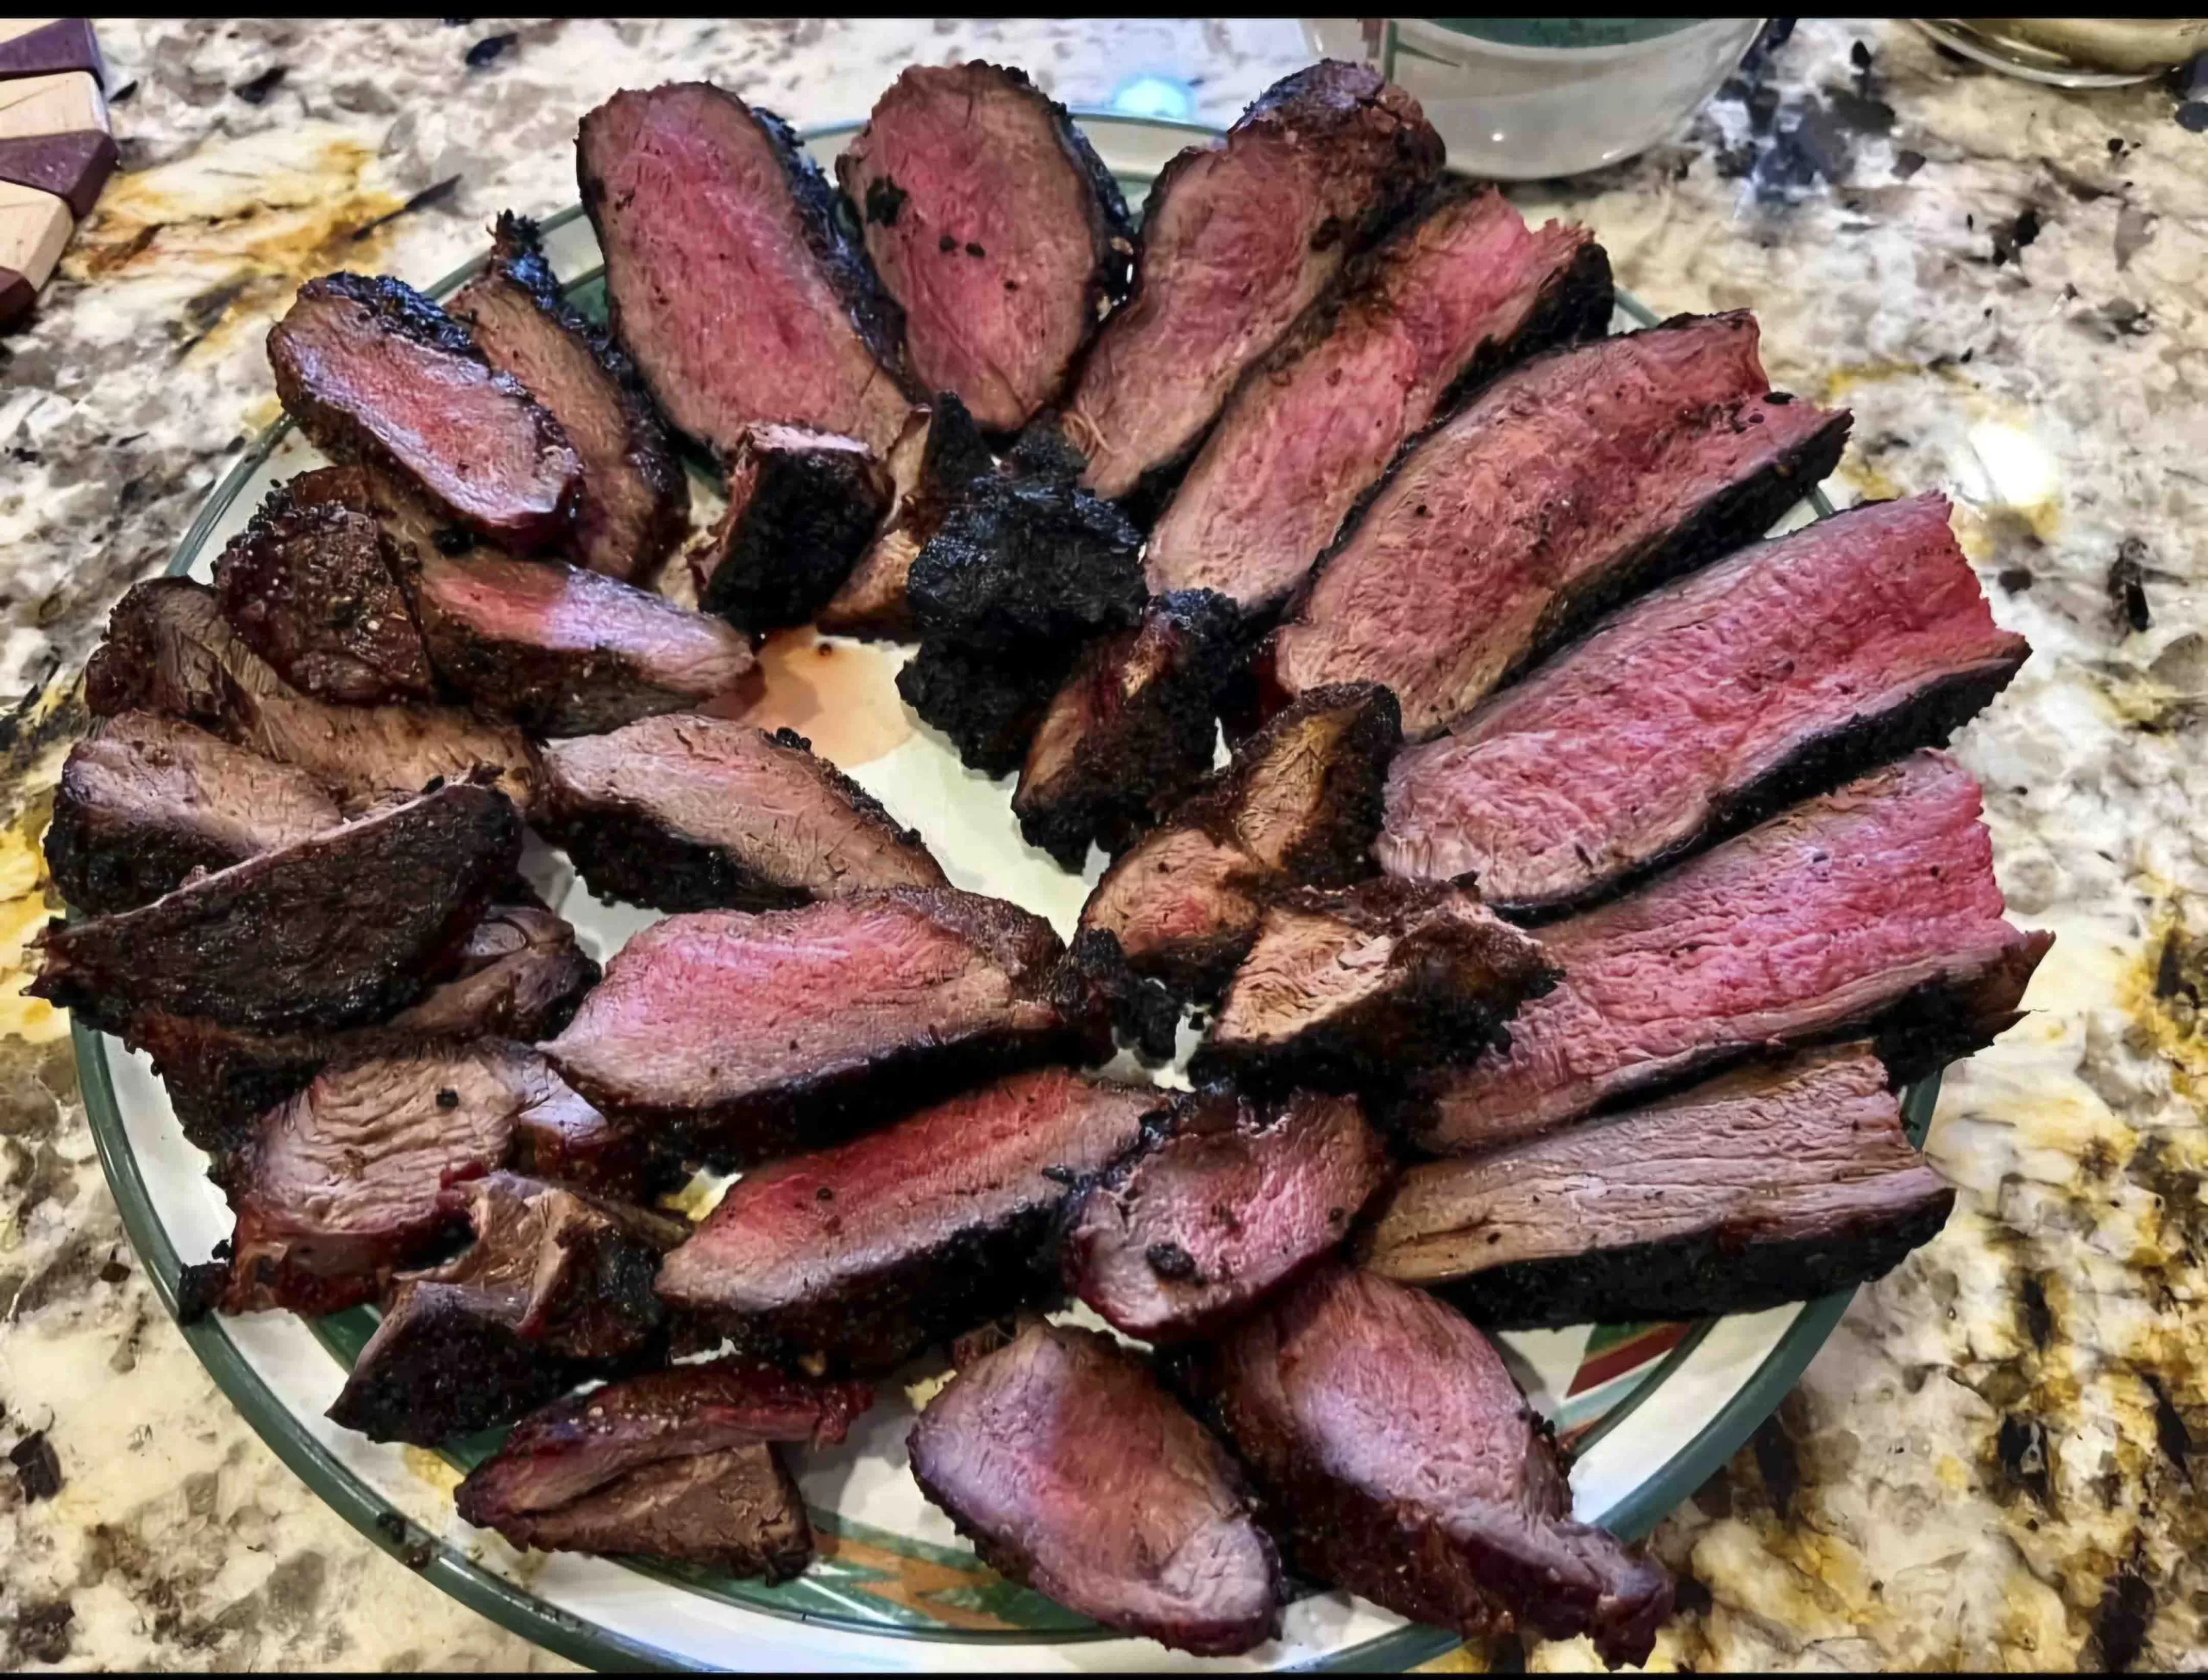
My wife and I like to entertain friends and family at our house for meals paired with a nice wine. For one recent get-together the main dish was chili-rubbed venison and home-smoked cheese. We knew chili-rubbed ribeye steak was fantastic, so it would probably be just as good or better with venison, which we paired with a Malbec. To bridge the cheese and meat, we also grilled a spicy, air-dried country sausage from Rich Square, North Carolina. For this particular party we had grapes, a variety of crackers, and mustards to accompany the cheese and venison. We also had bacon-wrapped quail to have along with a chilled glass of Chardonnay.
Most of these friends had never really experienced meat and fowl that was not store-bought and farm-raised. Despite being outside of their culinary comfort zones, the guests were astonished at venison’s succulence. The bite of the sausage along with the smokiness of the cheese was a gastronomic delight. The grapes and wine helped take the edge off any heat associated with spices, and was spectacular with the charcoal-cooked meats.
The party was a huge hit. By the end of the evening there were enough leftovers for everyone to take some home for more meals. We’ll be making these wild game get-togethers a tradition.
Recipe
Chili-Rubbed Venison
(Feeds 8-10)
Ingredients
1 venison roast (3 to 4 pounds) or three 6 to 8-inch whole pieces of backstrap
Chili rub or powder
Black pepper
Salt
Directions
Rub salt and pepper on the venison, then rub with chili powder. Heat charcoal grill to 500 degrees.
Let the coals ash over for a good sear. Place the roast or backstrap directly over the coals. For the 3- to 4-pound cut of meat, I seared the top and bottom for 7-8 minutes per side for medium rare to medium.
Place several pats of butter on top of the seared meat while it’s still hot. Tent the venison with aluminum foil and let rest for 15 minutes. Slice the meat to the desired thickness and serve with the au jus made from the melting butter and juices from the resting meat.
Smoked Cheese
Ingredients
Your choice of hard cheese. We used two cheddar cheeses and a gouda.
Directions
It’s best to smoke cheese during cooler months, when the outside temperature is no more than 50 to 55 degrees, and timed a few months ahead of its intended consumption. I used a Weber Charcoal Summit Kamado smoker/grill.
Heat four or five charcoal briquettes until they ash over. Add two or three more briquettes and two or three pieces of hickory chunks to the burning charcoal and close the dampers until the grill temperature stays under 90 degrees.
Smoke the cheese for two hours. For a milder flavor, just pull off the smoker sooner.
Remove cheese from the grill and place it in the refrigerator to cool for up to 48 hours. Wrap in parchment paper and vacuum seal the cheese.
Return the sealed cheese to the refrigerator for a minimum of a month until the cheese has absorbed the smoke and it will begin to mellow. We left our cheese in the refrigerator for four months; it was a perfect smoky, cheesy flavor.
Cecil Cherry is a native North Carolinian who graduated from East Carolina University and retired as a law enforcement officer from the North Carolina State Bureau of Investigation. Cecil enjoys outdoor pursuits, traveling to North Carolina wineries with his wife, Pam, and sharing the bounty of field to plate with friends and family.
Located in downtown Billings, Montana, Walker’s Grill enjoys a reputation as one of the best restaurants in the area. It may not deserve Michelin stars, but this is eastern Montana meat-and-potatoes country. Whenever we overnight in Billings to catch a plane, we usually treat ourselves to dinner at Walker’s.
Like most good restaurants, the menu there is a mix of old standbys and new recipes getting a test drive. We have long been intrigued by one of those regulars that seems to have been there forever: James Beard’s meatloaf. We always swear we’re going to try it but never do. Granted, Beard was once one of the country’s most famous chefs and a pioneer of television cooking shows, but meatloaf? Our expectation for a restaurant meal is something we couldn’t throw together just as easily (and more cheaply) at home, either because of the quality of the ingredients or a unique presentation. Anybody can make meatloaf out of anything, right?
GROUND VENISON MEATLOAF IS DIFFERENT AND UTILIZES CUTS THAT CAN’T BE COOKED STAND-ALONE
Well, yeah … and that’s one of the wonderful things about meatloaf. It’s a basic concept that can be modified in many ways depending upon availability of different ingredients and individual tastes. It fares particularly well using ground venison as a starting point and creating different variations from there. As discussed earlier, we recognize that you can’t make a stand-alone meal out of every cut from a venison carcass. But with proper handling, a deer can yield excellent ground meat (burger) that can be made into almost anything, including meatloaf.
Most of us ate plenty of meatloaf when we were growing up. Ingredients were inexpensive and readily obtained; preparation was quick and easy—perfect for a busy household with hungry kids. While every family seemed to have its own favorite recipe, most meatloaf tasted pretty much the same and quickly became boring. What kid has never said, “Oh, no! Not meatloaf again.”
We can do better, and using ground venison instead of the traditional beef burger is a good place to start. Unfortunately, meatloaf made with lean meat tends to come out dry and crumbly, so we recommend supplementing the venison with ground pork in a 2:1 ratio. Using the seasoned sausage of your choice will allow even greater variety in the finished product. It would be hard for most of us to imagine meatloaf without ketchup, but commercial ketchup suffers from the same problem as most meatloaf: It all tastes nearly the same and quickly becomes boring. We prefer the zippier version described below as a change of pace.
It’ll have you saying, “Oh, boy! Meatloaf!”
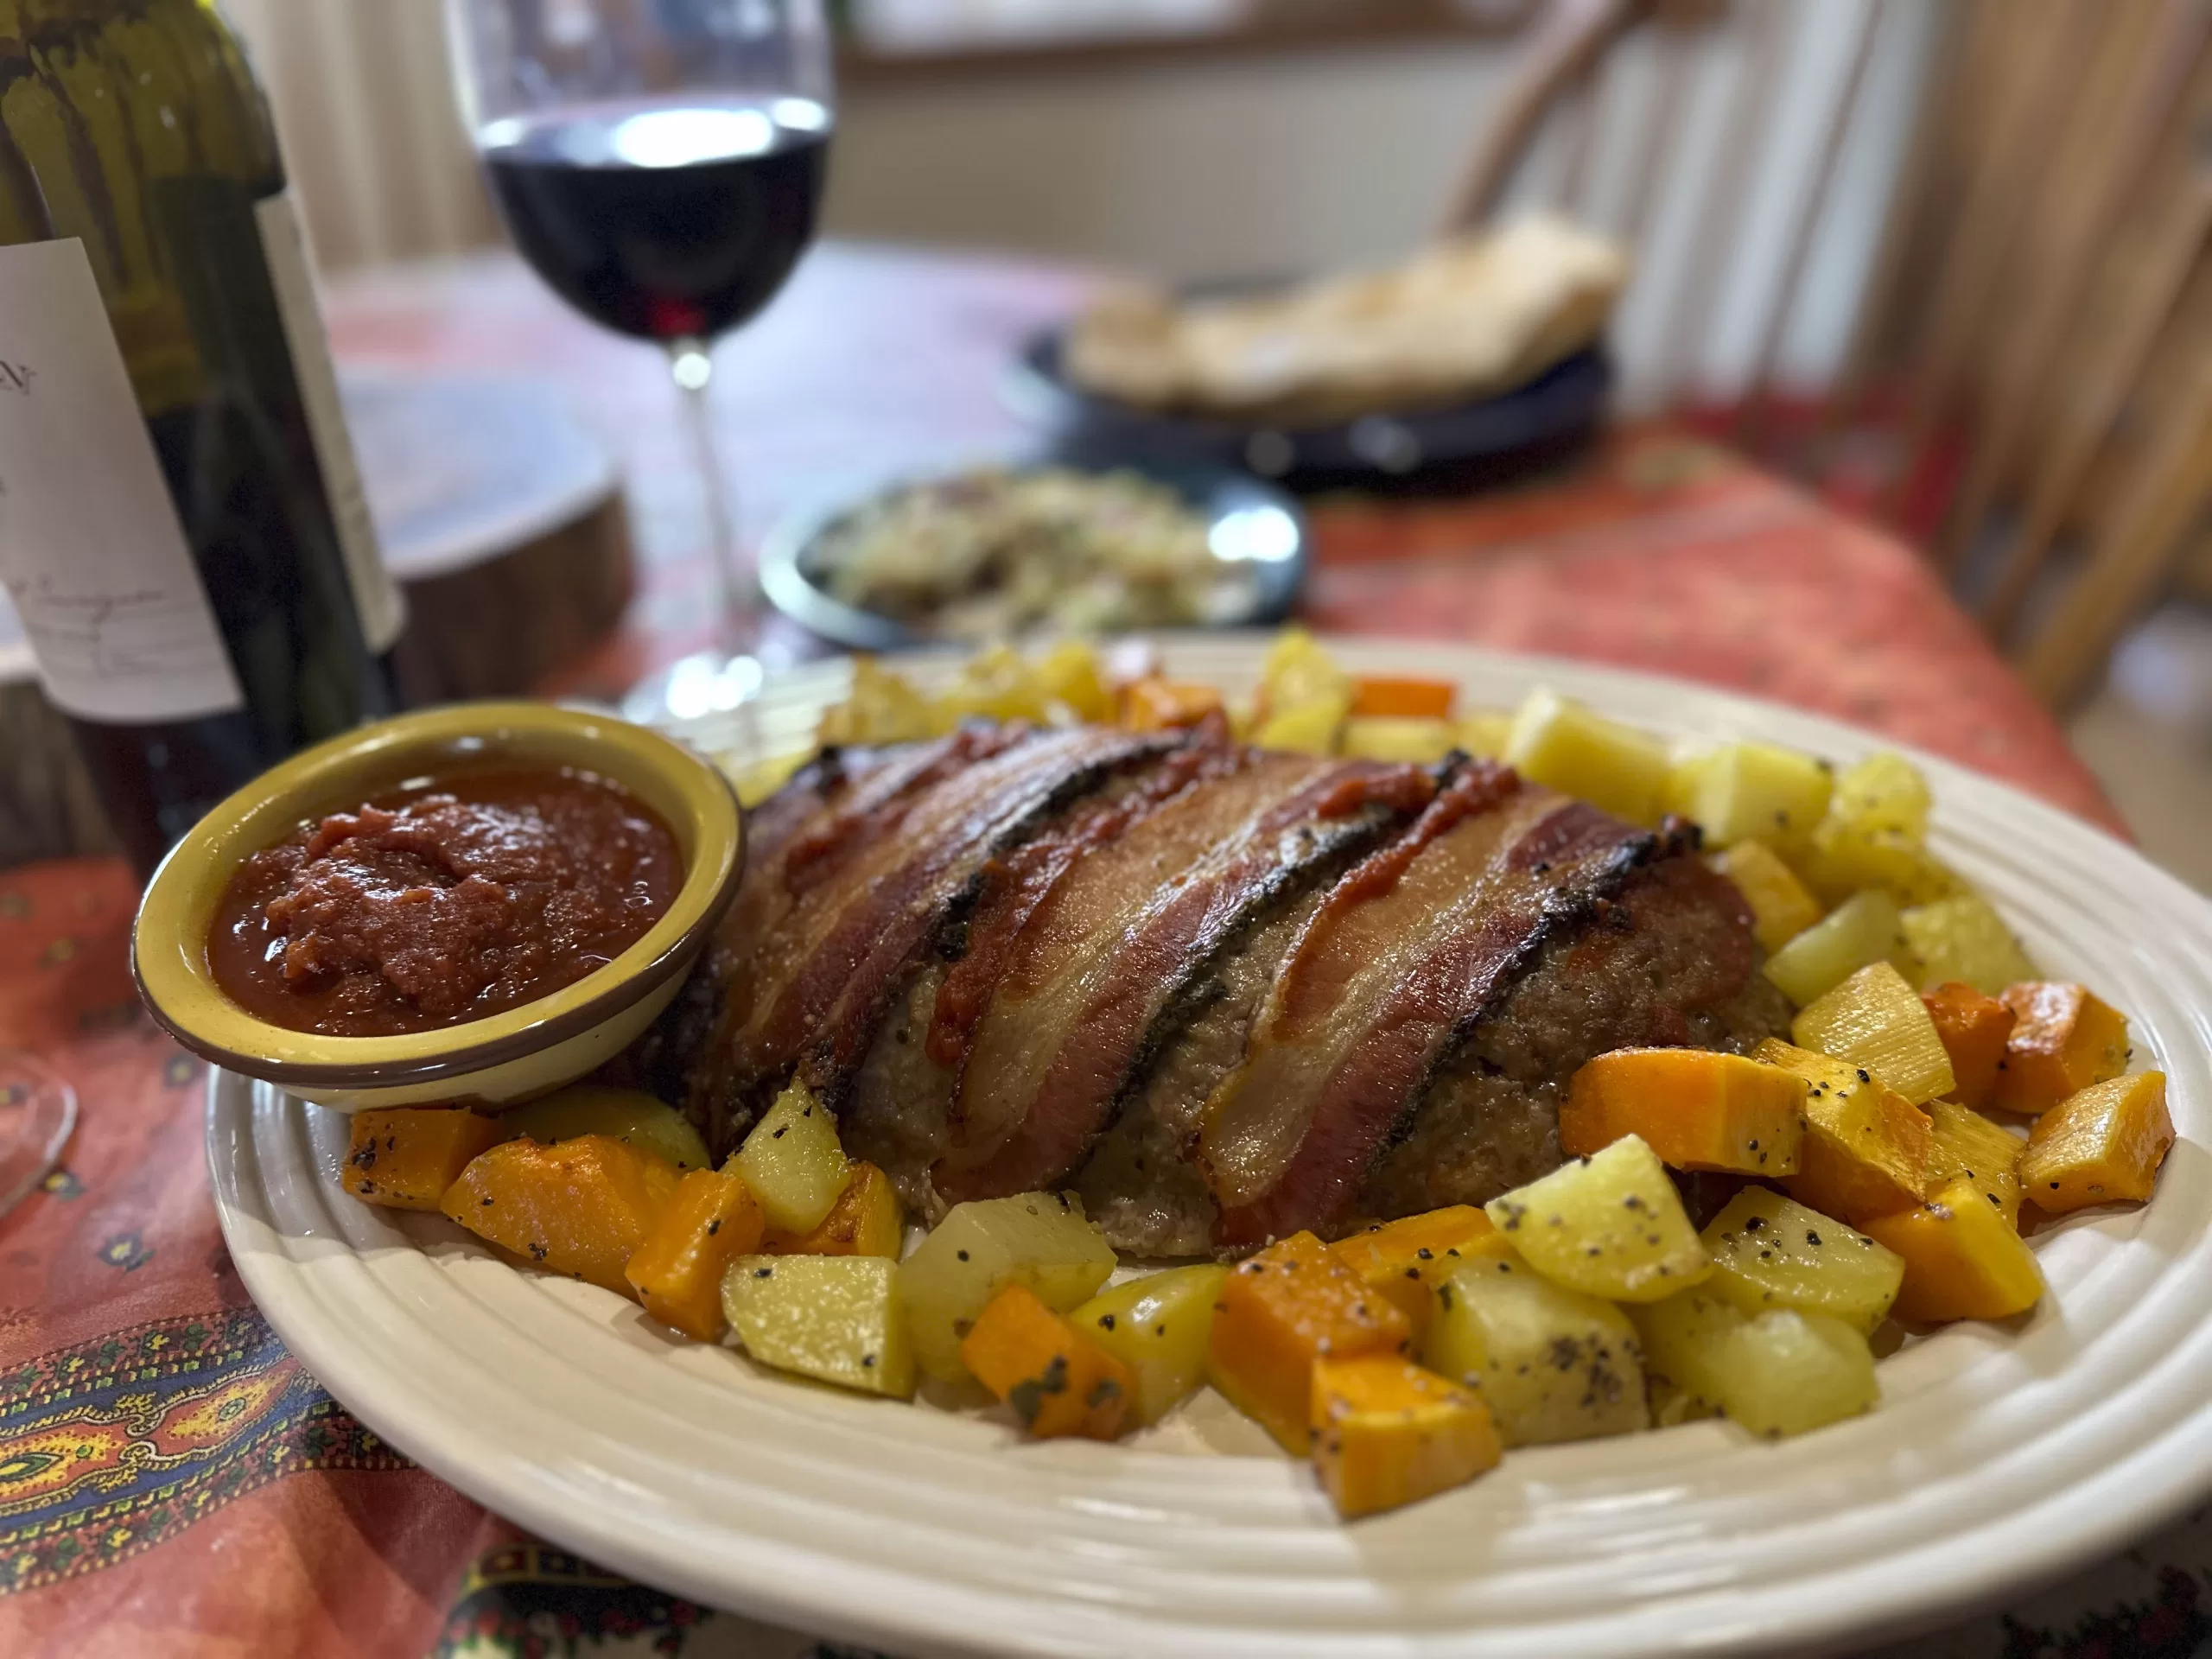
RECIPE – Not Your Mother’s Venison Meatloaf
Ingredients (serves 6)
2 lbs ground venison
1 lb pork sausage
1 large onion, finely diced
1 celery stalk, finely diced
2 carrots, shredded
4 garlic cloves, chopped
1 tsp rosemary
Dash ground nutmeg
Salt and black pepper to taste
1 tsp capers, minced
2 tbsp soy sauce
Chili garlic sauce to taste (1-2 tbsp)
3 eggs, lightly beaten
1 cup fresh breadcrumbs
½ cup milk
1 tbsp vegetable oil
6 bacon slices
Directions
Heat oil in a large skillet over medium heat and add the celery, onion, grated carrots, and ½ tsp sea salt. Sauté until softened, about 5 minutes. Add minced garlic and cook for about a minute more. Remove from heat and let cool for several minutes.
Add the milk to breadcrumbs and let soak.
Add the sauteed vegetables, ground venison, ground pork, eggs, chili garlic sauce, spices, and soy sauce to a large mixing bowl.
Mix to combine. At this point, take a tablespoon of the mixture and cook thoroughly on a hot skillet. Let it cool and have a taste, adjusting seasonings to your preference.
Place the mixture on a greased baking pan. Mold into a loaf by hand.
Criss-cross bacon strips across top of loaf. You may add some ketchup on the top.
Bake at 350 degrees F for 60 minutes or until internal temperature reaches 160 F. Baking time may vary depending on how you shape the loaf.
RECIPE – Not Your Mother’s Chipotle Ketchup
(May be made up to two months in advance.)
Ingredients
2 bay leaves
1 tsp black peppercorns
1 tsp mustard seeds
3 whole cloves
1 small cinnamon stick
¼ tsp allspice
1 tbsp vegetable oil
1 medium onion, chopped
1 6 oz can tomato paste
3 minced garlic cloves
2 tbsp minced canned chipotle in adobo sauce
3 pounds fresh tomatoes, cored and chopped. May substitute 3 cans of diced tomatoes, drained.
¾ cup cider vinegar
1/3 cup brown sugar
Salt to taste
Directions
Place the first six ingredients in cheesecloth and tie closed with twine. Cut back on cloves if you prefer less of that distinctive taste.
Heat oil in a Dutch oven and cook onion 5 minutes or until soft. Add tomato paste and garlic, mix well, and cook for another 2 minutes.
Place mixture from No. 2 above, chipotle, and half of tomatoes in a blender and puree until smooth, about 1 minute. Transfer to bowl, process remaining tomatoes, and combine.
In small batches, pass mixture through a fine strainer into a new bowl. Remove pulp and discard.
Add vinegar, sugar, salt, and spice sachet, bring to slow boil over medium heat, and stir until mixture thickens and darkens, approximately 30 minutes to an hour.
As mixture cools, funnel into 1-cup jars. Seal with lids and place in refrigerator, where ketchup will keep for up to two months.
Last fall my friend Jon and I hunted during the throes of a stormy New England day: 37 degrees, persistent rain, and driving wind. We didn’t love it, but Jon’s springer pup didn’t mind at all. The New Hampshire covert we were hunting was dense and dripping with the pelting rain. A narrow game trail cut through stands of thick alders that at times made it seem like we were hunting in a tunnel. We walked single file: I in the lead as it was my turn to shoot with Finley quartering to both sides of the trail. Things were slow in a spot where we usually find birds. We were commiserating that they might have picked up and left before the storm, when Fin popped a bird up. The cover was so stupidly thick it flew right at me, and I ducked as it knuckleballed over my head and down the trail. I let off one and then the other barrel as the woodcock vanished into the dark tangle.
When it comes to gunning, I am cack-handed and clumsy at best, which always has me searching for an excuse after missed shots. Still, I was amazed I had missed such an easy going-away shot. This time I had no excuse. Then I looked down at my gun barrels and noticed a fresh splattering of woodcock chalk (what others might call bird shit).
“That’s one impressive dollop!” said Jon. “That pile is so big I don’t know how you could see down your barrels.”
I’d found my excuse.
The incident still stands as the ultimate insult from a woodcock, never to be equaled.
The American woodcock has a long list of disparaging nicknames. With colloquialisms like timberdoodle, bogsucker, hokumpoke, and mudsnipe, this little bird deals with a lot of verbal bullying. In contrast, I find woodcock to be a glorious, quirky, and especially succulent addition to the table. These wonderful little birds deserve our best culinary efforts. The following is a recipe that hopes to show the proper respect for such a worthy quarry.
Farro has an addictive, nutty taste and is one of three earthy tones in this dish, along with maitake mushrooms and the woodcock. Maitake (or hen-of-the-woods) mushrooms grow in northern temperate forests, but it is not uncommon to find them in Southeastern states. Where I live in the Northeast, they are usually found in late summer growing at the base of maple and oak trees. These days you can also find them in many grocery stores and farmers’ markets. Maitake are full-flavored with a mild heat and work well with other strong flavors. As with all mushrooms, give them a quick rinse to remove excess dirt and woody debris before cooking. If maitake aren’t around, try using dried porcini instead or whatever mushrooms you have on hand that fit the bill. Again, strong assertive flavors give the dish a distinctive, earthy boost.
Hunters who aren’t fans of eating woodcock are likely overcooking their quarry. Left in the pan too long they taste livery, tough, and dry. Baste the birds with the pan juices and butter until the tiny breasts are just cooked, and you have one of nature’s finest fares. Remember: All proteins continue to cook after turning off the heat, so err on the side of caution.
Serves: 4
Prep Time: 20 minutes
Cook Time: 45 minutes
Ingredients:
4 tablespoons olive oil
4 tablespoons butter
4 whole woodcock, ready to cook
1 medium leek, washed and diced
5-6 ounces maitake (hen-of-the-woods) mushrooms, rinsed in cold water, cut into bite-sized pieces
2 cloves garlic, chopped
2 teaspoons fresh thyme, chopped
1 cup farro
½ cup white wine
4 cups game bird or chicken stock
1 cup spinach, washed
¾ cup parmesan, grated plus more for garnish
Salt and black pepper to taste
In a large skillet, heat half the olive oil and half the butter. Sprinkle the woodcock with salt and pepper and brown them well on all sides, basting as they cook, about 5 to 7 minutes. Remove the birds to a warm platter and reserve.
Add leek, maitake, garlic, and thyme to the pan, sprinkle with salt and pepper, and cook over medium heat, stirring, for 5 to 6 minutes until leek softens and mushrooms are tender.
Add farro and stir well. Add white wine and cook until wine is absorbed, about 3 minutes. Add stock and bring to a boil. Lower the heat to medium and continue cooking until farro is tender and most of the liquid has been absorbed, about 25 to 35 minutes. Taste for salt and pepper.
When ready to serve, add spinach and moisten with a touch of stock or water if dry. Add remaining butter and parmesan, stirring gently as the spinach wilts and the farro reheats. Nestle woodcock into the farro mixture, season with salt and black pepper, and continue heating for a few more minutes.
Spoon the farro mixture into bowls and top each with a woodcock sprinkled with additional parmesan.
My first hunt, 10 seasons ago, was a dove hunt. On the invitation of my then-boyfriend, now-husband’s friends, we tagged along to hunt on an Indian reservation in Arizona somewhere on the Colorado River. It was September, and daytime temperatures hit 114 degrees that weekend—a heat so dry that it made our lungs feel like brown paper sacks.
For a first-time hunter, doves are a tough initiation. Although the dove symbolizes peace, don’t mistake that for frailty. These fast-flying birds can change direction on a dime, seemingly possessing a Matrix-like ability to dodge shot. And just when you think you’ve hit one, it keeps on sailing.
I’m still not sure if I actually hit the dove that Rick let me claim on that hunt. What I do know for sure is that I burned more shells than the number of birds I could share with my party for the grill that night. And I certainly didn’t take home any meat for a recipe—unfortunately, there wouldn’t be a dove recipe for a long while. Perhaps it was lack of opportunity—but more likely embarrassment—that prevented me from pursuing doves again for several years, at least not seriously.
Then finally, during the summer of 2019, I decided to pull my head out of the sand. I was going to become a better wingshooter. I connected with a local shooting instructor, and once a week during the summers of 2019 and 2020 I was out on the range familiarizing myself with my 20-gauge over/under.
I still suck, but I’m glad to suck a little less. And my time in the field has become so much more enjoyable and rewarding. All that practice culminated in an early-September dove hunt in the Nebraska Sandhills with new friends. I didn’t shoot my limit, but I came as close as I could, and I was happy with it. The difference was night and day compared to my first dove hunt a decade ago. And best of all, I now had enough doves in the freezer for several recipes, one of which I’m offering here.
As we enter another hunting season, the September dove opener is a reminder to aim small to miss small. For the meat hunter, it also means you get to eat more.
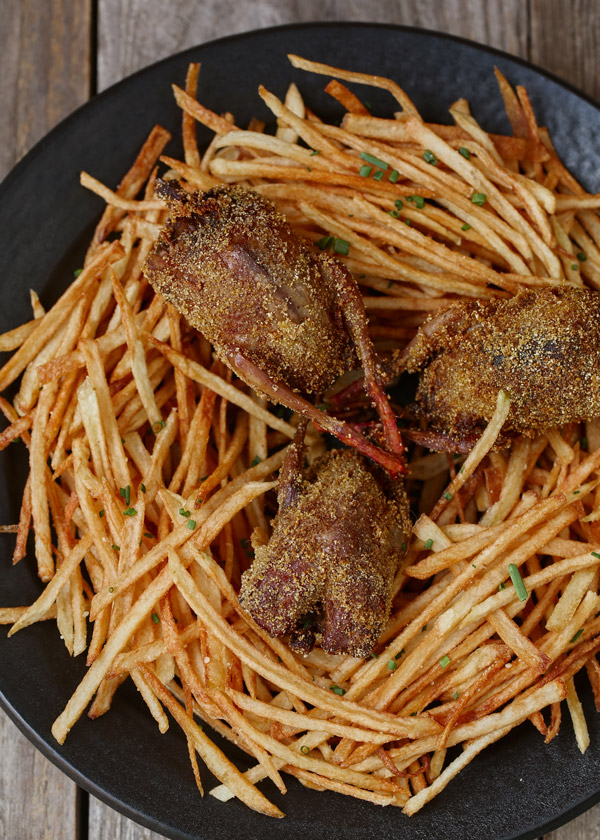
Dove and Shoestring Fries
Servings: 4 appetizers
Prep Time: 1 hour 30 minutes
Cooking Time: 30 minutes
Ingredients:
– 16 whole plucked doves
– 1 cup of milk
– Sea salt, to taste
– 2/3 cup of cornmeal, plus extra
– 1 tablespoon of paprika, to taste
– Mild curry powder, to taste
– 5 large russet potatoes
– Frying oil (peanut, canola, corn, etc.)
– Lawry’s Seasoned Salt, to taste
1. Peel potatoes and slice thinly with a mandoline, about 1/4 to 1/3-inch thick. Then cut slices into matchsticks. Rinse potato sticks and then submerge in a bowl of ice water for one hour. Next, drain potatoes and spread them onto a large cookie sheet lined with paper towels. Dab the top side dry with paper towels. Potatoes must be dry before frying, which will prevent splattering and allow them to crisp.
2. Turn oven to warm setting. In a saucepan or fryer, heat oil to 350 degrees Fahrenheit. Meanwhile, rinse doves in cold water and allow to sit in milk and set aside.
3. When the oil comes to temperature, cook potatoes in batches until golden and crispy. Drain and immediately toss with seasoned salt. Keep shoestring fries warm in the oven as you fry the remaining potatoes. Always allow oil to return to 350 degrees before adding a new batch of raw potato. Remove oil from heat while you prepare the doves for frying.
4. Combine cornmeal and paprika. Remove doves from milk and do not pat dry. Season doves with sea salt—including inside the cavity—and coat with cornmeal mixture; the milk helps the cornmeal adhere to the birds, so rewet birds if the cornmeal isn’t sticking.
5. Return oil to 350 degrees and fry doves in batches for four to five minutes, or until cornmeal coating becomes golden and crispy all over, flipping doves halfway through. Carefully remove doves from oil and immediately dust with curry powder while still hot and wet from the oil. Serve immediately with shoestring fries and desired condiments.
Salted Caramel Apple Cider
Ingredients:
– 2 ounces Smirnoff Kissed Caramel Vodka, or to taste
– Apple cider
– 1 wedge of lemon or lime
– Kosher salt
– Ice
– Whipped cream
– Hershey’s caramel syrup
– Diced fresh apple, for garnish (optional)
Moisten the rim of a pint-size Mason jar with a lemon or lime wedge, and then salt the rim. Fill the jar three-quarters of the way with ice. Add caramel-flavored vodka and fill the rest of the way with apple cider. Add whipped cream on top and drizzle with caramel syrup. Garnish with pieces of apple on a toothpick (optional).
Spring is akin to a great awakening in nature. Everything seems to emerge from hibernation at once, bursting back to life from a long winter waiting for warmer days. Spring also signals the beginning of our primary foraging, fishing, and hunting seasons, aside from the small amount of freezer-filling possible during the winter months. Gone is the need to tap into the reserves, as opportunities to harvest our own food begin to grow exponentially.
Now don’t get me wrong, I love our long winters here in Minnesota. Ice fishing, snowshoeing, and small game hunting during the dark winter months are some of my favorite activities of the year. We’re used to being creative in the bitter cold, like drilling holes in the ice so we can keep fishing year-round. Trust me: It really is fun! But nothing beats the spring fishing opener.
Over the years, I’ve spent the majority of my fishing openers in the Boundary Waters Canoe Area Wilderness (BWCA). My relationship with the BWCA began when I was 12 years old during a lake trout fishing trip with my Dad. It was chock-full of everything a backcountry camping trip can throw at you: amazing fishing, freezing rain, high winds, sunny days, a snowstorm, campfires, lessons in safety and stewardship principles, being wet and miserable, and so much more. And I loved it. It was a trip that would solidify my connection to the outdoors for the rest of my life.
Read the Whole Wilderness Story & Bake the Fisherman’s Pie Subscribe to Strung Magazine Click Here or buy the Latest Issue Click Here
I typically eat lighter during the summer months, and many Vietnamese dishes check that box. My family is from South Vietnam, and although both my mother’s and father’s ancestral homes enjoy the benefits of the coastal breezes that come into Nha Trang, we have to fly into Saigon whenever we visit, and the air in the interior is always stifling. It seems like no matter what time of year I check, daytime temperatures in Saigon hover in the 90s, along with humidity that’ll make you sweat even under a cold shower in January.
With a climate that can be sweltering year-round, the food of Vietnam isn’t known for being heavy. Even our iconic bread–called bánh mì–would be considered light next to its precursor. Inspired by and created during France’s colonization of Vietnam, the Vietnamese baguette is markedly more delicate than its imperial counterpart.
My father holds onto fond memories of buying bánh mì on the street corner on his way to school as a boy. Although he could only afford a splash of hot cooking liquid from the cart’s pot of braised pork belly inside his bread, at 82 years old this remains one of my dad’s favorite food memories. He can still recall the smell of fresh yeasty bread mingling with savory aromas steaming from the braising pot. “When I had spare change, that was breakfast,” he says dreamily. “It was such a treat.”
Vietnamese-French bread is the ideal sandwich bread. When fresh, its thin, golden-crispy crust offers a satisfying crunch that yields to every bite. And unlike traditional French bread, its crumb is tender and airy, not dense–perfect for filling with generous amounts of meat and vegetables, while inviting warm juices and sauces. Delicious stuffed or simply eaten with butter, spreadable cheese, or a few dashes of Maggi sauce–one of my mom’s favorite snacks–there’s nothing like enjoying fresh-from-the-oven bánh mì by itself. You always have to sacrifice a piece while traveling home from the bakery–at least I could never help myself.
Now that I’ve made you hungry, you might be expecting a recipe; unfortunately, I am going to disappoint. Vietnamese families don’t typically bake their own bread. Visiting the neighborhood bakery while on a grocery run is a part of Vietnamese life. That’s how my family had bánh mì while I was growing up–and having made our home in the Little Saigon district of Southern California, good bánh mì wasn’t hard to come by. I’m glad to see more bánh mì shops opening in the metro areas of my home state of Nebraska these days. Unless you live in the boonies, I bet there’s a shop near you. Ask for the bread by itself.
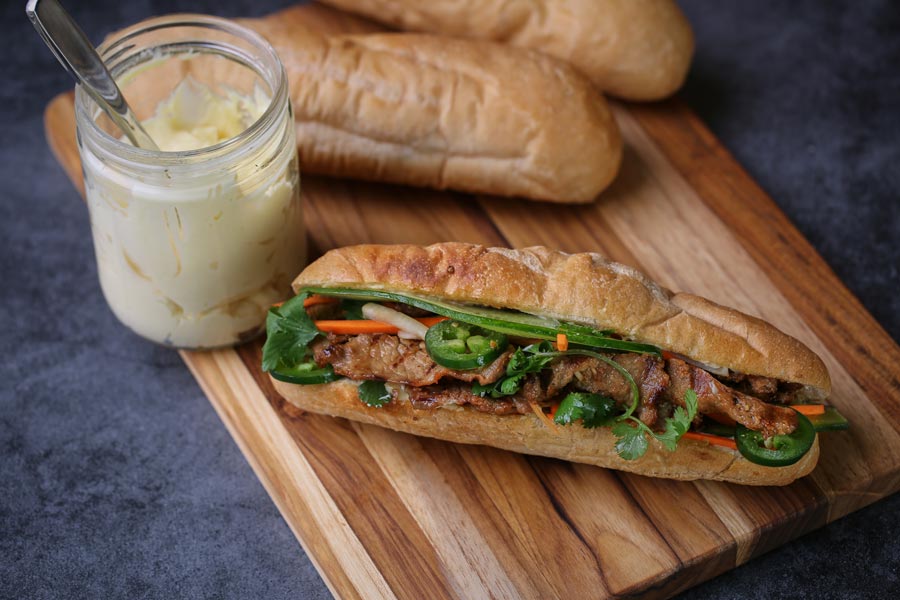
Bánh mì can be filled with anything. Vietnam’s signature sandwich includes an assortment of thinly sliced cold cuts, generous amounts of pork liver pâté, and full-fat mayonnaise, and it is always garnished with plenty of carrot and daikon pickles and fresh herbs for balance. Making Vietnamese cold cuts isn’t something that I’ve delved into yet, so for this issue’s recipe, I’m mirroring another classic: grilled pork bánh mì. Pork is used heavily in Vietnamese cooking, and luckily, I just recently came into some wild boar meat from Texas.
Although leaner and a bit tougher than domestic pork, cook wild boar similarly. The same rules apply: Cook to at least 145 degrees to kill trichinosis, brine or marinate when possible for juiciness and tenderness, and don’t overcook the meat unless you’re going to braise it.
I I referenced Andrea Nguyen’s Viet World Kitchen blog for her full-fat mayonnaise recipe.
Grilled Wild Boar Bánh Mì
Servings: 4 sandwiches
Prep Time: Overnight
Cooking Time: 15 minutes
Ingredients:
– 1½ pounds of wild boar loin
– 4 bánh mì rolls*
– Sliced cucumber
– Sliced jalapeño
– Small bunch of cilantro
Marinade
– 4 cloves of garlic, minced
– 2 shallots, minced
– 2 tablespoons of brown sugar
– ½ teaspoon of freshly ground pepper
– 2 tablespoons of fish sauce
– 1 tablespoon of Shaoxing rice cooking wine (not vinegar)
– 2 tablespoons of canola oil, plus extra
– 2 tablespoons of dark soy sauce
Pickled Carrot & Daikon (makes extra)
– 1 large carrot, peeled and julienned
– Equal amount of daikon radish, peeled and julienned
– 1 teaspoon of sea salt
– 1 tablespoon + 2 teaspoons of white sugar
– 1 cup of white wine vinegar
Full-Fat Mayonnaise (makes 1 generous cup)
– 2 egg yolks
– ½ teaspoon of kosher salt
– 1 tablespoon of lime juice
– ½ teaspoon of Dijon mustard
– 2 teaspoons of white wine vinegar
– 1 cup of canola oil
Special Equipment: skewers
* If there is no Vietnamese bakery or bánh mì shop near you, substitute with Mexican bolillo rolls.
1. The night before, remove silver skin on loin and thinly slice against the grain. In a small bowl, combine marinade ingredients and add pork to coat. Cover and refrigerate for 8 hours.
2. To make pickles, sprinkle sea salt and sugar over the julienned carrot and daikon. Submerge with white wine vinegar and stir. Allow to sit for at least 30 minutes before serving, or refrigerate in a jar until ready to eat. This quick pickle will keep for 2 weeks in the refrigerator.
3. If using wooden skewers, soak in water for 30 minutes prior to grilling. Prepare grill for direct, high-heat cooking.
Meanwhile, make the full-fat mayonnaise: Combine egg yolks, salt, lime juice, Dijon mustard, and white wine vinegar in a food processor and pulse 4 to 5 times to combine. Then with the machine running on low, gradually add canola oil in a thin, steady stream and whip until thickened. If your mayonnaise breaks, whip in an extra egg yolk. Keep mayonnaise cold until ready to use.
4. Thread marinated wild boar meat onto skewers and brush with canola oil. Grill on high heat for caramelization all over, flipping halfway through; this shouldn’t take long. Split open slightly toasted bánh mì bread and spread mayonnaise on the inside. Fill with grilled wild boar, cucumber, jalapeño, a few whole sprigs of cilantro, and pickled carrot and daikon. Serve immediately.
“Ditch Water” Plum Brandy
Ingredients:
– 6 pounds of ripe wild plums – 3½ cups of Sugar in the Raw (turbinado sugar), plus extra
– White sugar, optional – About 1 bottle of brandy
– Twist of lemon zest
Special Equipment: cheesecloth, rubber band, large glass jar
1. Only rinse plums if they are noticeably dirty, but do not rub off the bloom–the white, waxy coating on the fruit. The bloom contains wild yeast, which helps fermentation. Slice each plum to allow juices to escape.
2. Transfer cut plums to a bowl and coat with raw sugar. Add more sugar as needed; the fruit needs to be well coated. Transfer plums to a large jar, allowing at least a couple inches of headspace. Then use a potato masher or something similar to push down the fruit to help release juices. After a few hours to a day, juices should completely submerge plums. If not, add water, which prevents the fruit from spoiling. Use something heavy to weigh down the fruit.
3. Use cheesecloth to cover the jar and secure with a rubber band. Store in a cool, dry place to ferment for 2 weeks. The amount of bubbling and foaming will vary. If you start to see mold, scoop it out when it’s in its white stages. Don’t wait until the mold gets black, which is toxic.
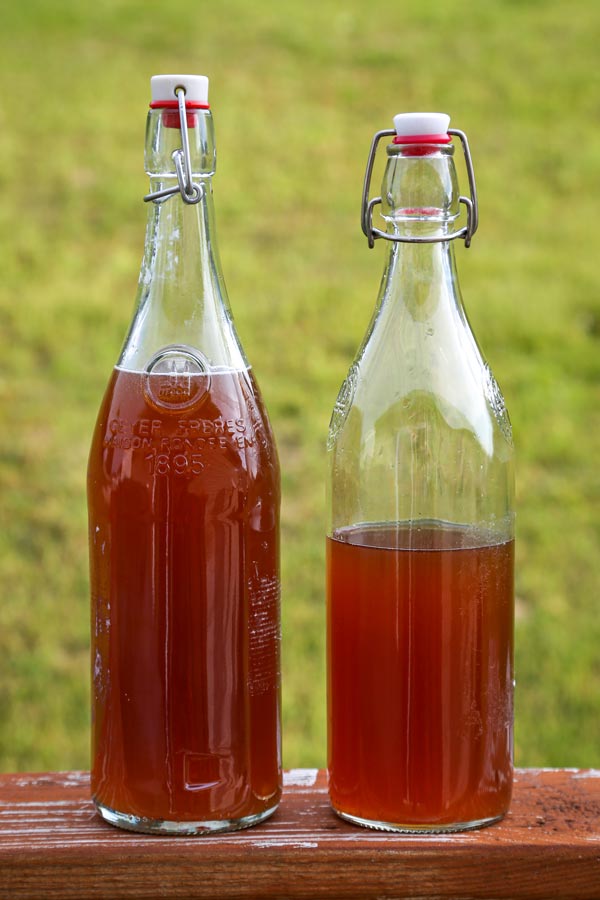
4. Strain the fermented plum juice through cheesecloth and discard the fruit and seeds. Transfer to clean jars or bottles and add equal parts brandy. If needed, add white sugar to taste.
Chill and enjoy the brandy now or, for a clearer drink, allow sediment to form at the bottom and siphon off the clear liquid into different bottles. Keep refrigerated.
I enjoy this plum brandy chilled with a twist of lemon zest on top. It’s also refreshing over ice.