Flyfishing and Hunting Photography – Shooting in Low Light
By Sammy Chang
As outdoorsmen and women who hunt and fly fish in an increasingly technological world, we must balance being in the moment and wanting to capture that moment on our electronic devices. I prefer to keep my cell phone in a watertight bag on my back. Not carrying it on my immediate person eliminates the temptation to have it in my hand. This is not to judge those of you who do use your phone as your imaging device or need to have access for other reasons. Rather, it is a personal decision to step away from the device that otherwise keeps us “connected” all the time. The disconnect is the reason many of us get away into the woods and on to the water in the first place.
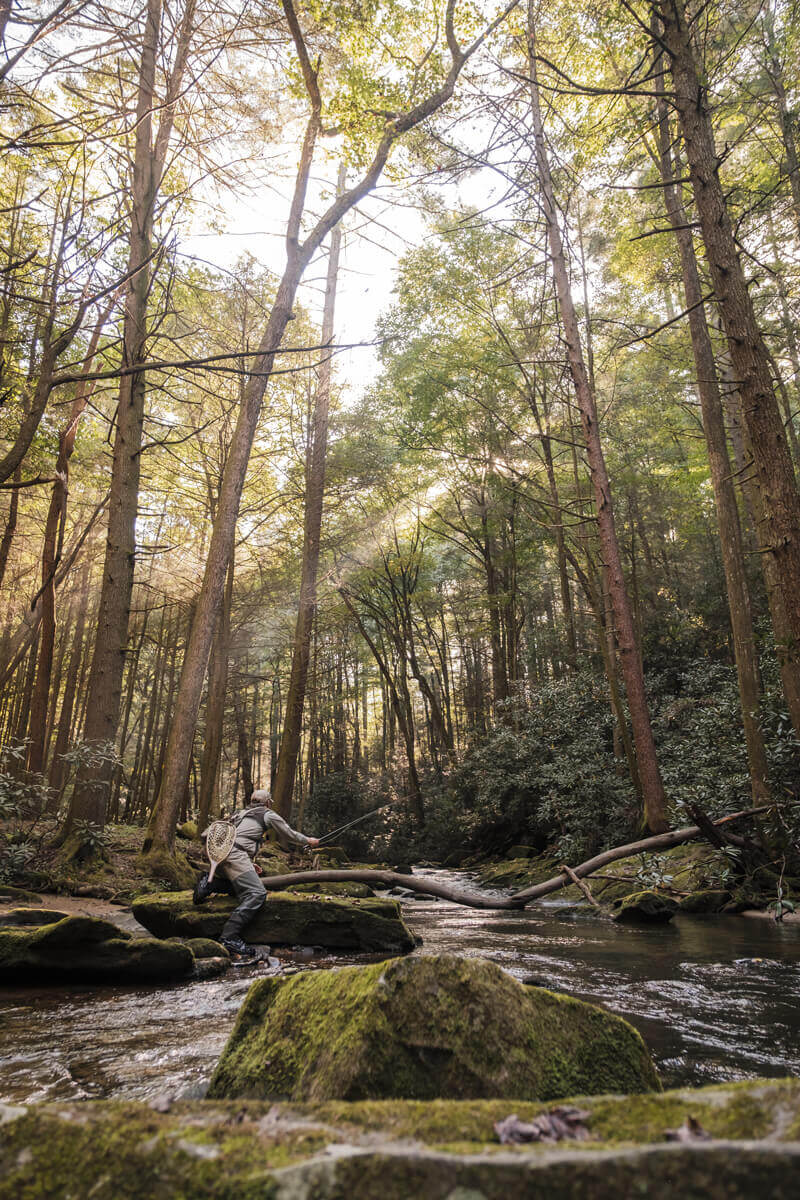
As an outdoor photographer, I have found almost equal satisfaction in putting my rod down and capturing the fleeting moments that my fishing and hunting partners experience. It’s micro-seconds of intensity and emotion, minutiae around camp, rides to the water, etc. that encompass the reason we each pursue our sports. Those moments are rarely in optimal lighting: low light on the creek due to a high tree canopy; pre-dawn or post-dusk; in the car; first light in the turkey woods; scenes through tree and branch tunnels dappled with broken light.
It is for those of you just getting into photography with a mirrorless camera or DSLR that I share this post. I promise you it is worth lugging the camera gear – you’ll start to see the world around and in front of you differently. You’ll realize it’s impossible to create quality photos with a camera phone. To increase the success of sharp photos, having your camera on the right settings is imperative. I shoot in full manual mode, and recommend that at least while starting out, you do the same. Shooting in full manual will force you to understand the exposure triangle – and when you understand this it will propel your creativity and images immensely.

The basic premise is this – you need to maintain a fairly fast shutter speed (unless you have an incredibly steady hand) to make sure your photos are sharp. As a rule of thumb, I prefer my shutter speed to be 1/100 or faster. I can get by with 1/80 but often have less images that are tack-sharp. Another rule of thumb is that your shutter speed should be 2x your focal length (if you’re shooting a 50 mm full frame lens, your shutter speed needs to be 1/100 or faster). In order to shoot at fast enough shutter speeds and still have enough light to make sure your images are not under exposed, you can alter 3 variables.
1. Find more light (but again, the point is sometimes you just can’t create light that looks natural or captures the moment appropriately). The following points are really for those of you who like shooting in natural light; I’ll admit, I don’t ever use flash (and rarely should you ever use your camera’s “built in” flash if you want to have solid images). There are lots of photographers who are incredible with adjunct light but it’s not what I do (especially in the field).
2. Increase your ISO. Essentially this is your sensor’s sensitivity to light. Without getting too technical, when you increase your ISO your images become brighter at a set shutter speed. The trade off is that your images will start to look increasingly grainy at higher ISO’s. I used to worry about grain but as I have progressed I am not as deterred by it; of course there is a balance and too much grain becomes undesirable or unusable depending on your end goals. I believe capturing the image sharp and having a useable image is more important that a bit of noise or grain. While it is somewhat camera dependent, I am comfortable bumping my camera to an ISO of 2500. I have sold images to publications with ISO’s in the 2000’s.
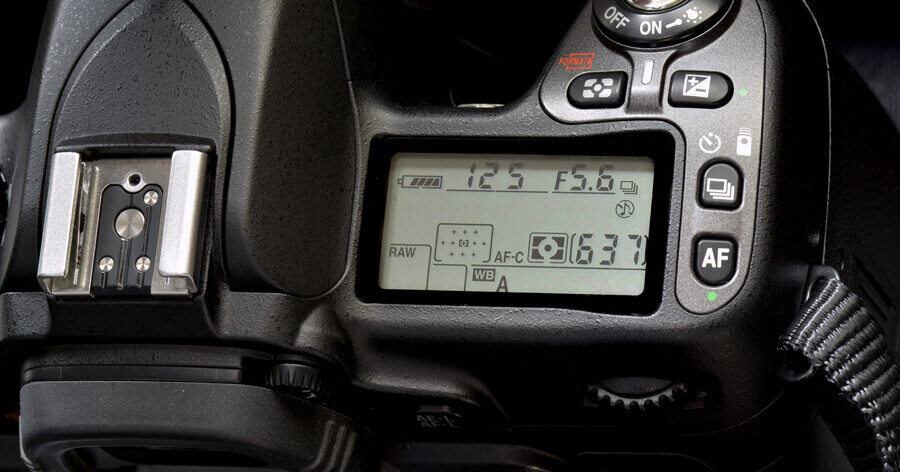
3. Open your aperture. Aperture refers to how open or closed your lens “pupil” is. This is seen on the camera or in settings as the f-stop. F/1.0 means your lens is wide open. F/22 means it’s pin-point. Think about your pupils. In bright light they constrict; they don’t need to be as wide open to capture as much light. In dark light they dilate to allow as much light in as possible. The trade off is the more wide open your aperture is, the narrower your depth of field will be. In other words, a wide open aperture means only a razor thin area will be in focus. The rest of the image will be blurry. A narrow aperture means more of the scene will be in focus. Think about when you try and see something in the distance that you can’t quite make out. Oftentimes we squint; the process of squinting creates a “narrower” aperture for the eye allowing us to see more things in the depth of the frame in focus. So, the trade off to opening up your aperture to allow more light in is you have to be more intentional about what you want to be in focus in your image. In low light, I shoot with my aperture as wide open as my lens will allow. This is often somewhere between f/2.0 – f/2.8.
In summary – shooting images in less than ideal natural light conditions requires you to have a firm grasp of the exposure triangle so that you may optimize your shutter speed and still have enough light hit your sensor to produce a usable photo. Setting your camera to a higher ISO and lower f/stop (more open aperture) will allow you to shoot at faster shutter speeds. Modern software helps eliminate some of the “noise” generated at high ISO settings, but sometimes that graininess lends itself to the mood of the photo. And you’d much rather have a sharp image with grain and noise then a noiseless image with significant blur.
The next time you are out, force yourself to try out manual mode, and take several images at different settings. When you study them in post, you’ll start to get a feel for what tweaking each setting does to the photo and I think you’ll find increasing satisfaction in bringing your camera with you on each fish or hunt.
Sammy Chang
 SUBSCRIBE TO STRUNG SPORTING JOURNAL